
You may remember back in August 2013 we started renovating our barn so that it looked more like a horse barn and less like a building with thrown together stalls inside it. (I mean literally the stalls were made from scratch pieces of lumber.)
We started out by gutting the barn and getting rid of the stalls that were there. See this > https://thenorthcarolinacowgirl.com/farm-improvements/horse-barn-renovations/
Then we started to build our own custom stalls. See this > https://thenorthcarolinacowgirl.com/farm-improvements/custom-arched-horse-stalls/
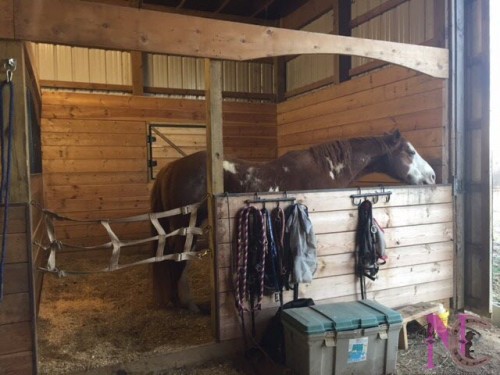
I knew from the very beginning of the renovation that I wanted open stalls so that the horses wouldn’t feel “caged” when they were kept inside. I loved the feel of the European stalls but all the kits I looked at were so expensive and I just couldn’t justify spending the money when they weren’t exactly what I wanted. So I set out to design my own stalls. It’s been a long process and the stalls still aren’t complete – but hey we’re almost there!
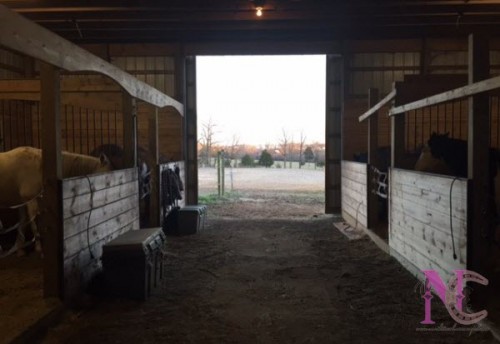
Here’s a few pictures of the stall fronts and newly finished windows. All that’s left is to finish the stall fronts for the stalls on the right side of the isle and finish the doors.
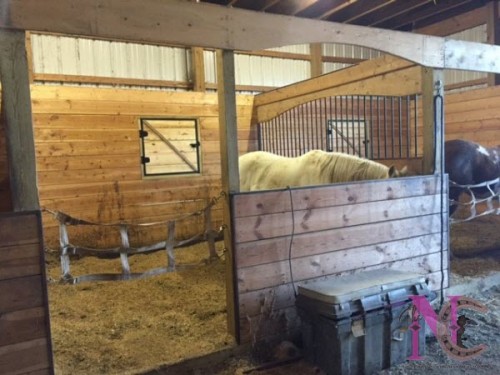

(The stick going across the middle will be taken off once we finish the outside of the door. The outside will have a flat piece of black metal going across the window.)
UPDATE: The stalls are now finish and I recently posted pictures of the stall doors!
UPDATE #2: The Step by Step guide to building these stalls is now available! So if you’re ready to start your very own project, click here to see the booklet options.
10 Comments
Lauren
January 20, 2015 at 10:43 amThose look so nice!
Weekend Cowgirl
January 22, 2015 at 3:41 pmGosh, it looks fabulous! How wonderful to have the nice stalls… Looks great. Guess it keeps them good and warm in winter.
Weekend Cowgirl recently posted..New Best Friend
Weekend Cowgirl
January 22, 2015 at 3:41 pmGosh, it looks fabulous! How wonderful to have the nice stalls… Looks great. Guess it keeps them good and warm in winter.
Weekend Cowgirl recently posted..New Best Friend
Kim
January 24, 2016 at 5:10 pmYour stalls are awesome! I am just getting started on my stalls. I am wondering if you used anything on the inside of your front wall to stablize it. Also, do you have a plan for your door design?
NC Cowgirl
January 25, 2016 at 1:04 pmHi Kim! Besides just nailing the boards to the post and wrapping the edges with metal, nothing is put in place to stabilize the front. I haven’t had any boards buckle and none of my horses have pushed on the fronts to cause any problems. As for the stall doors, those are finished and you can see the finished product here: https://thenorthcarolinacowgirl.com/horses/horse-barn-improvements-part-4-stalls-are-complete/.
Barn Improvements Part 2: Custom Arched Horse Stalls
January 25, 2016 at 1:08 pm[…] The barn is now finished and I’ve posted pictures on the finished stall fronts and stall […]
melissa
March 24, 2016 at 9:38 amI am getting ready to build our barn, and i love your stalls !! I am curious to see how wide they are? They look like a great size so i am curious to know the width !! Thank you
Horse Barn Improvements Part 4: Stalls are Complete
March 24, 2016 at 9:44 am[…] • Gutting the Barn • Building the frame and arched dividers • Custom Arched Stall Fronts […]
Vikki
April 1, 2016 at 1:56 pmWhere did you get the metal to cap the boards? Was it all ready channeled to fit over or did you have it specifically made?
NC Cowgirl
April 19, 2016 at 8:00 amHi Vikki, we had it custom made.